
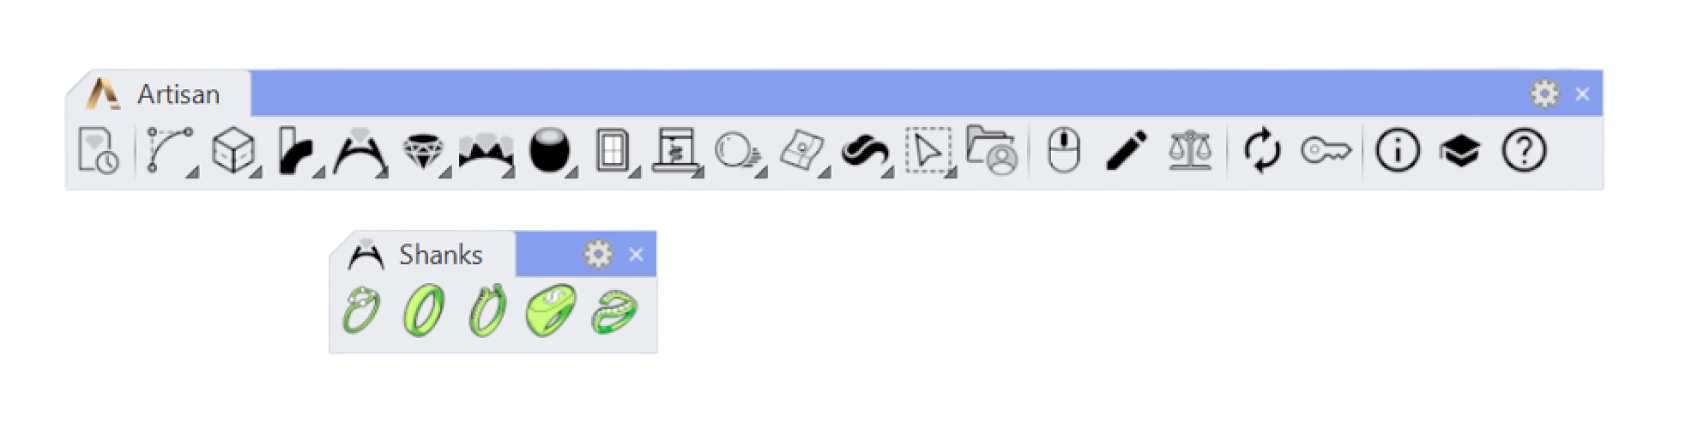
Shanks
Within this tab, you will see commands specifically made to create ring shanks, from Cathedral shanks to Advanced ring, and much more.
 Ring Curve
Ring CurveWith this command, you can create a curve of a ring, with the precise diameter of the size you want.
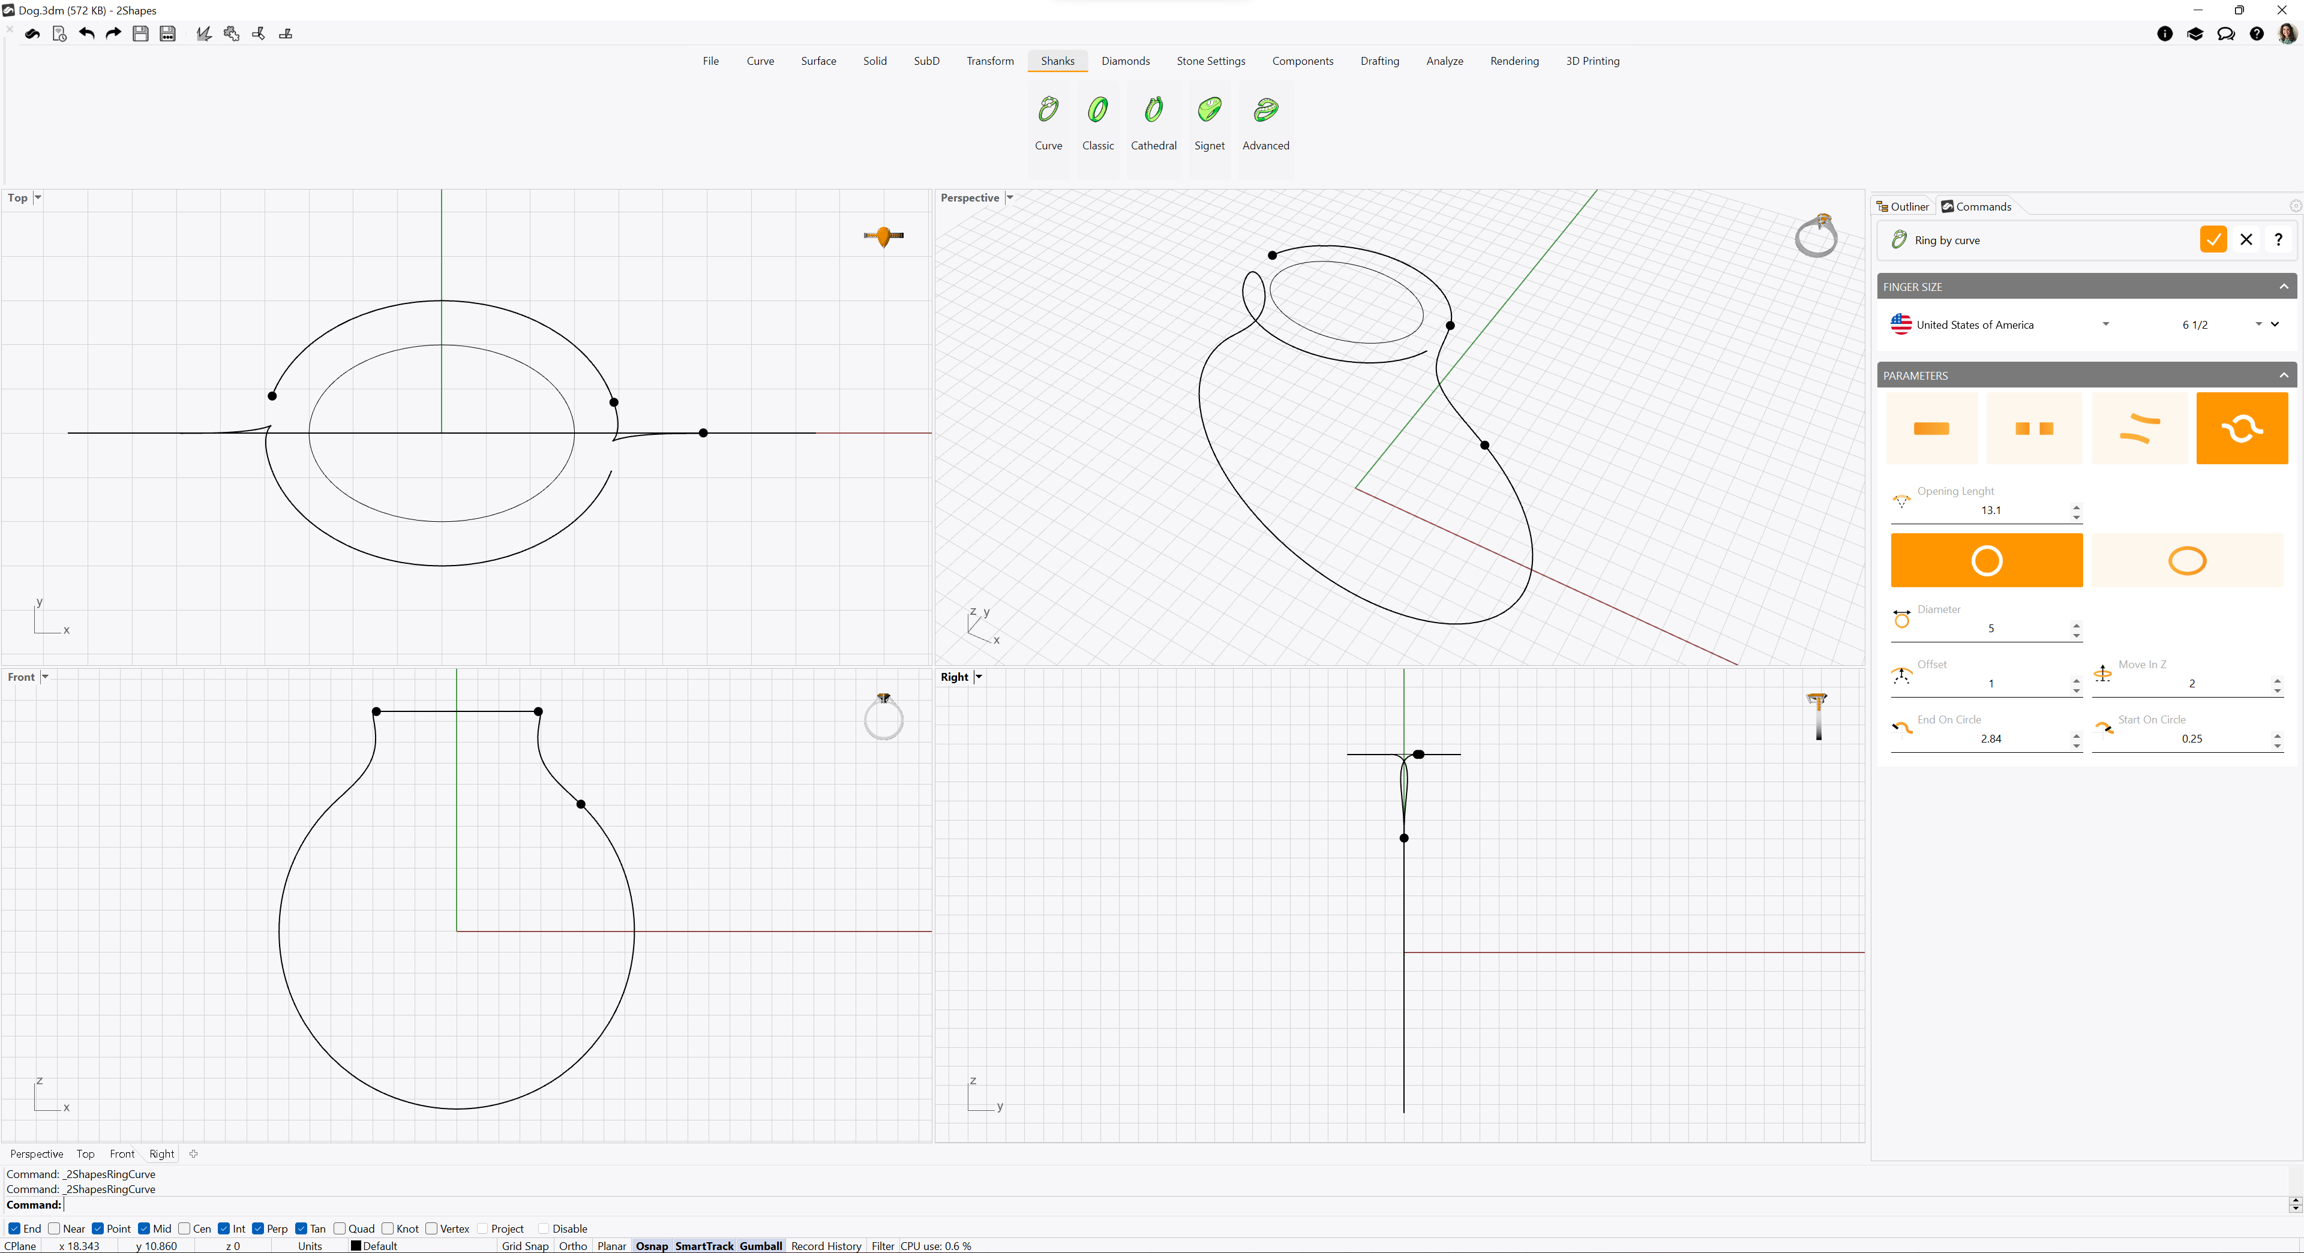
Running this command will display its parameters in the Commands toolbar.
Once the command has been executed, you can choose from various international sizing scales and sizes, and what type of curve you want to create, whether it is closed, open, bypass, or twisted.
When you confirm your changes, the Ring Curve will be listed on the Outliner toolbar.
Learn more about this command in Academy
 Cut by Ring Size
Cut by Ring SizeIn some cases, there are objects that fit inside the ring circle, so this command cuts and adjusts those parts that interfere with the space for the finger.
 Classic
ClassicUsing this command, you can create classic rings, especially useful for traditional engagement rings, wedding rings, and simple yet universally gorgeous designs.
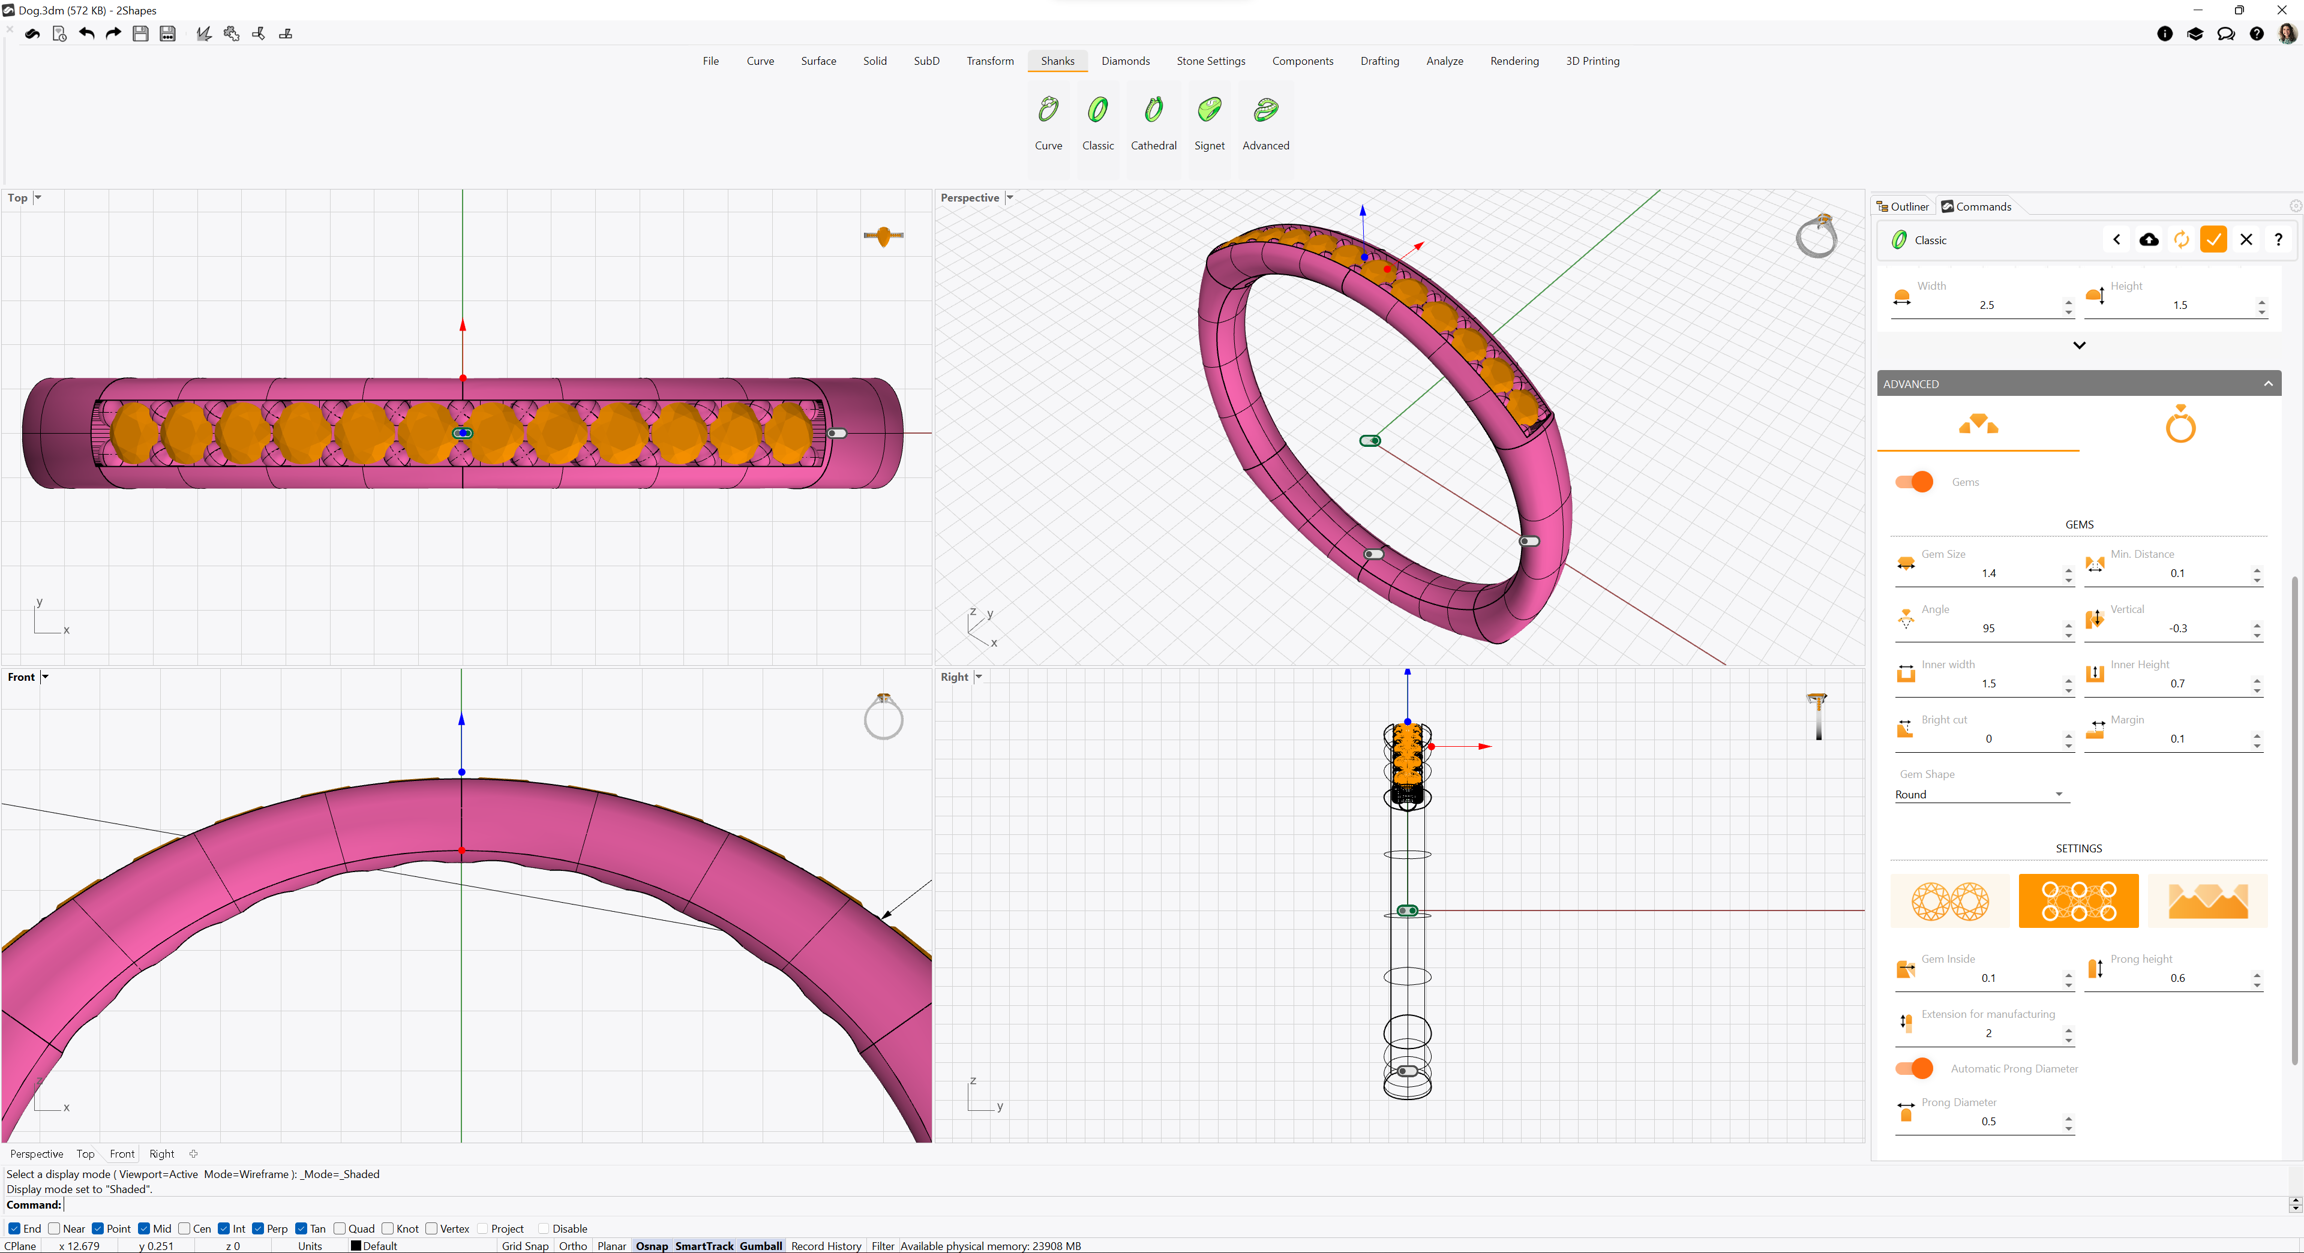
Running this command will display its parameters in the Commands toolbar. Your first step should be to choose whether you want to start working on a Standard style provided by 2Shapes, or an Organization style you have previously created.
On its parameters, you can find the ring size, measurements and the asset that will give shape to the shank, and options to add secondary gems on this element among other possibilities.
When you confirm your changes, the Classic Shank will be listed on the Outliner toolbar.
Learn more about this command in Academy
 Cathedral
CathedralUsing this command, you can create cathedral rings, especially useful to design fancy and vintage engagement rings with arms raising to support the gemsets on top.
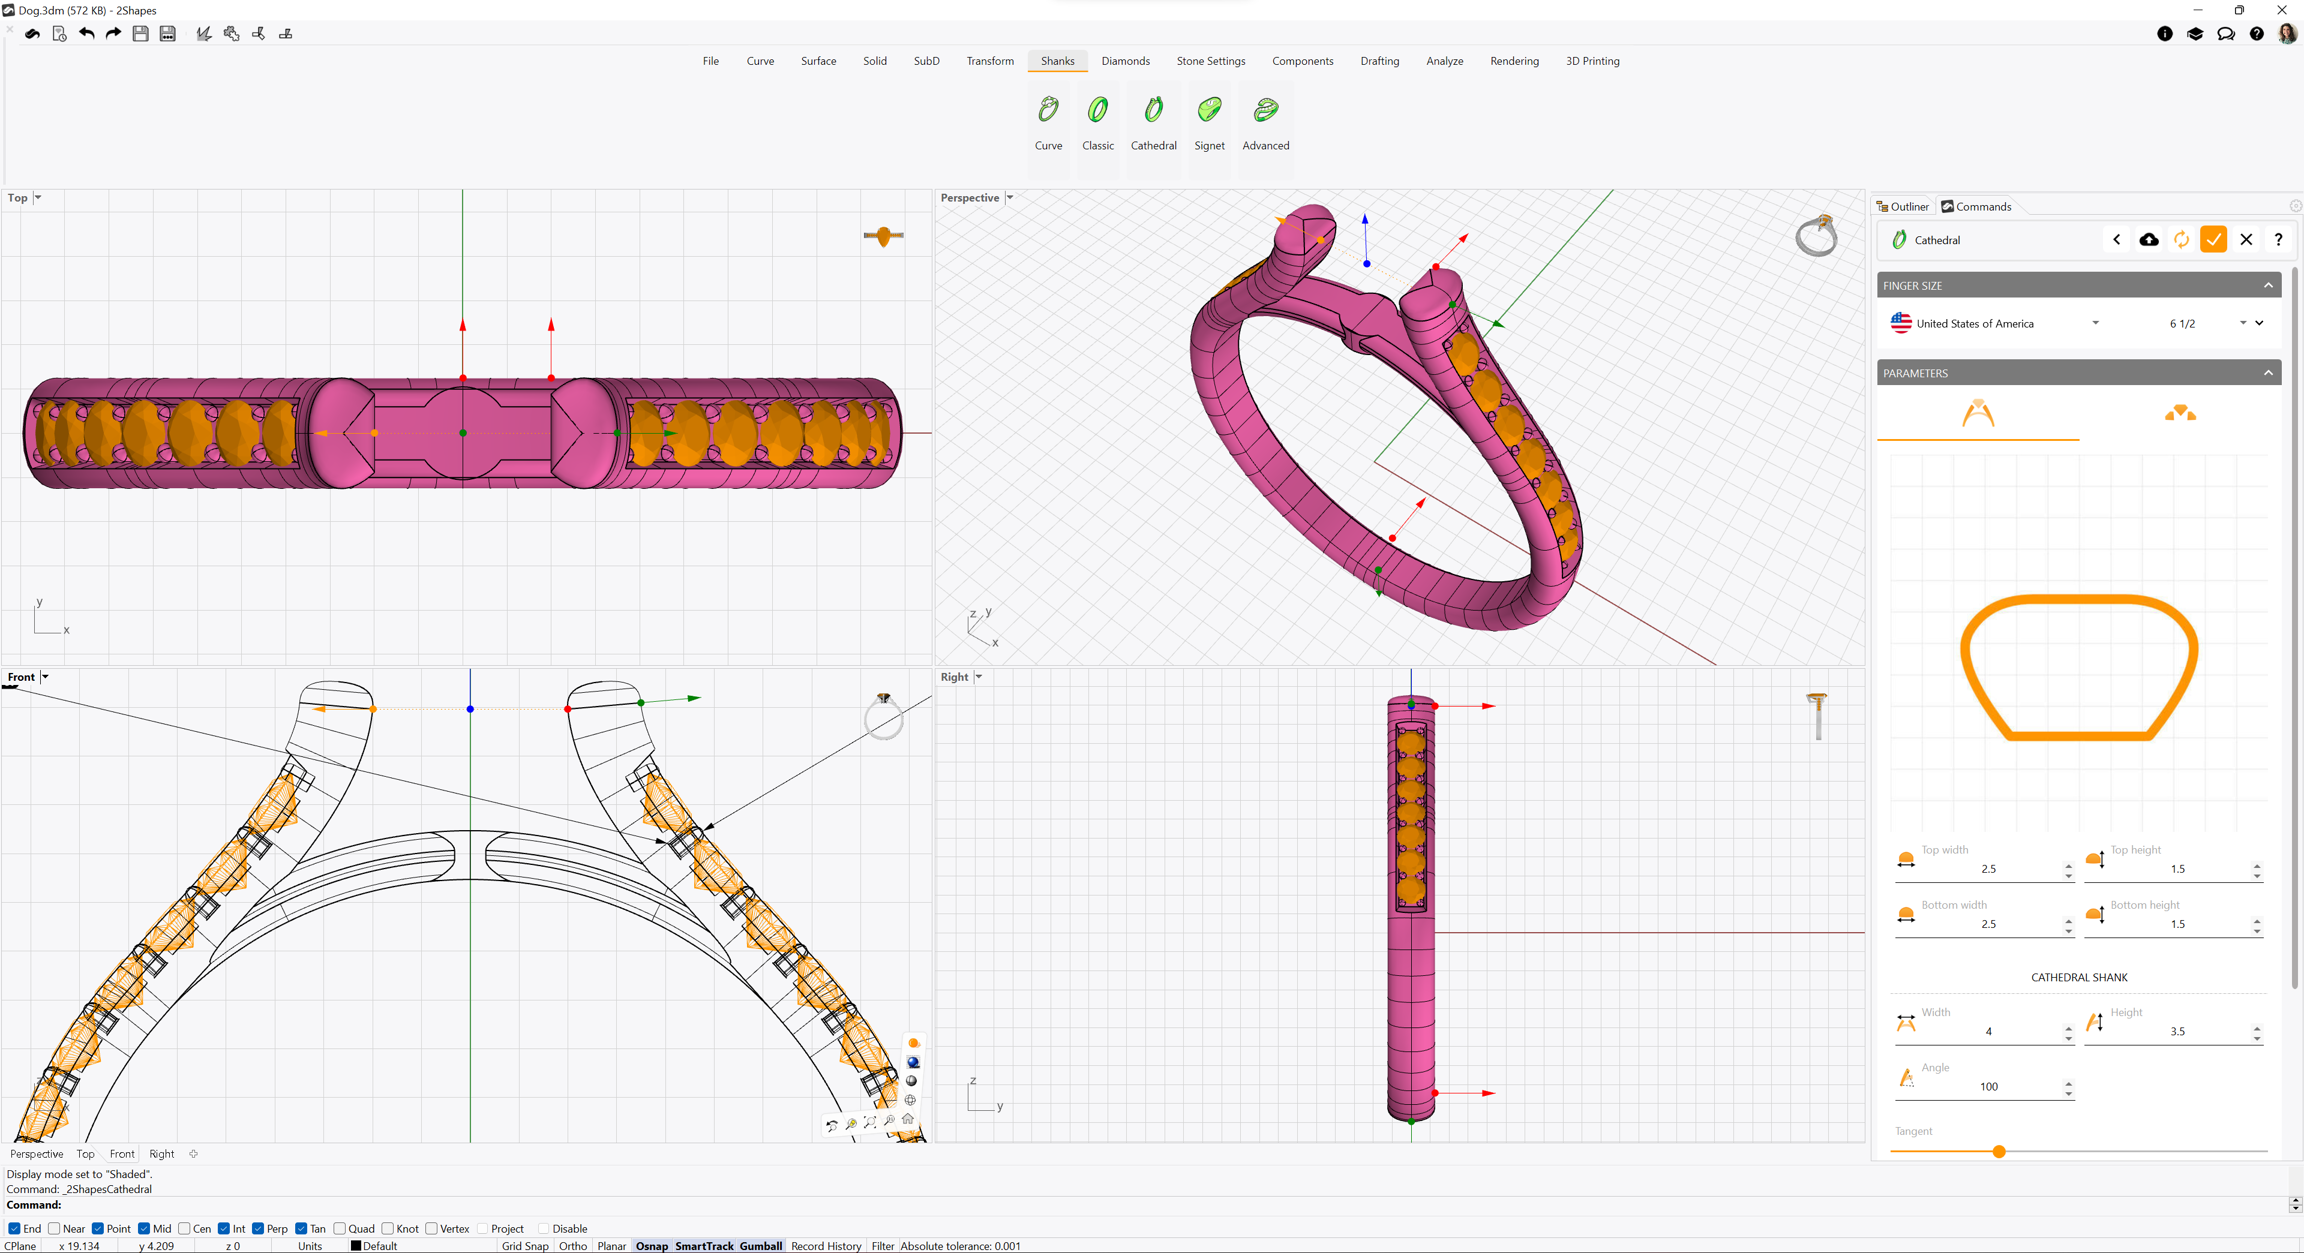
Running this command will display its parameters in the Commands toolbar. Your first step should be to choose whether you want to start working on a Standard style provided by 2Shapes, or an Organization style you have previously created.
On its parameters, you can find the ring size, measurements and the asset that will give shape to the shank, and options to add secondary gems on this element among other possibilities.
When you confirm your changes, the Cathedral Shank will be listed on the Outliner toolbar.
Learn more about this command in Academy
 Signet Ring
Signet RingUsing this command, you can create signet rings, a great style for the foundation of family crests, seals, university, and other types of elegant bold rings.
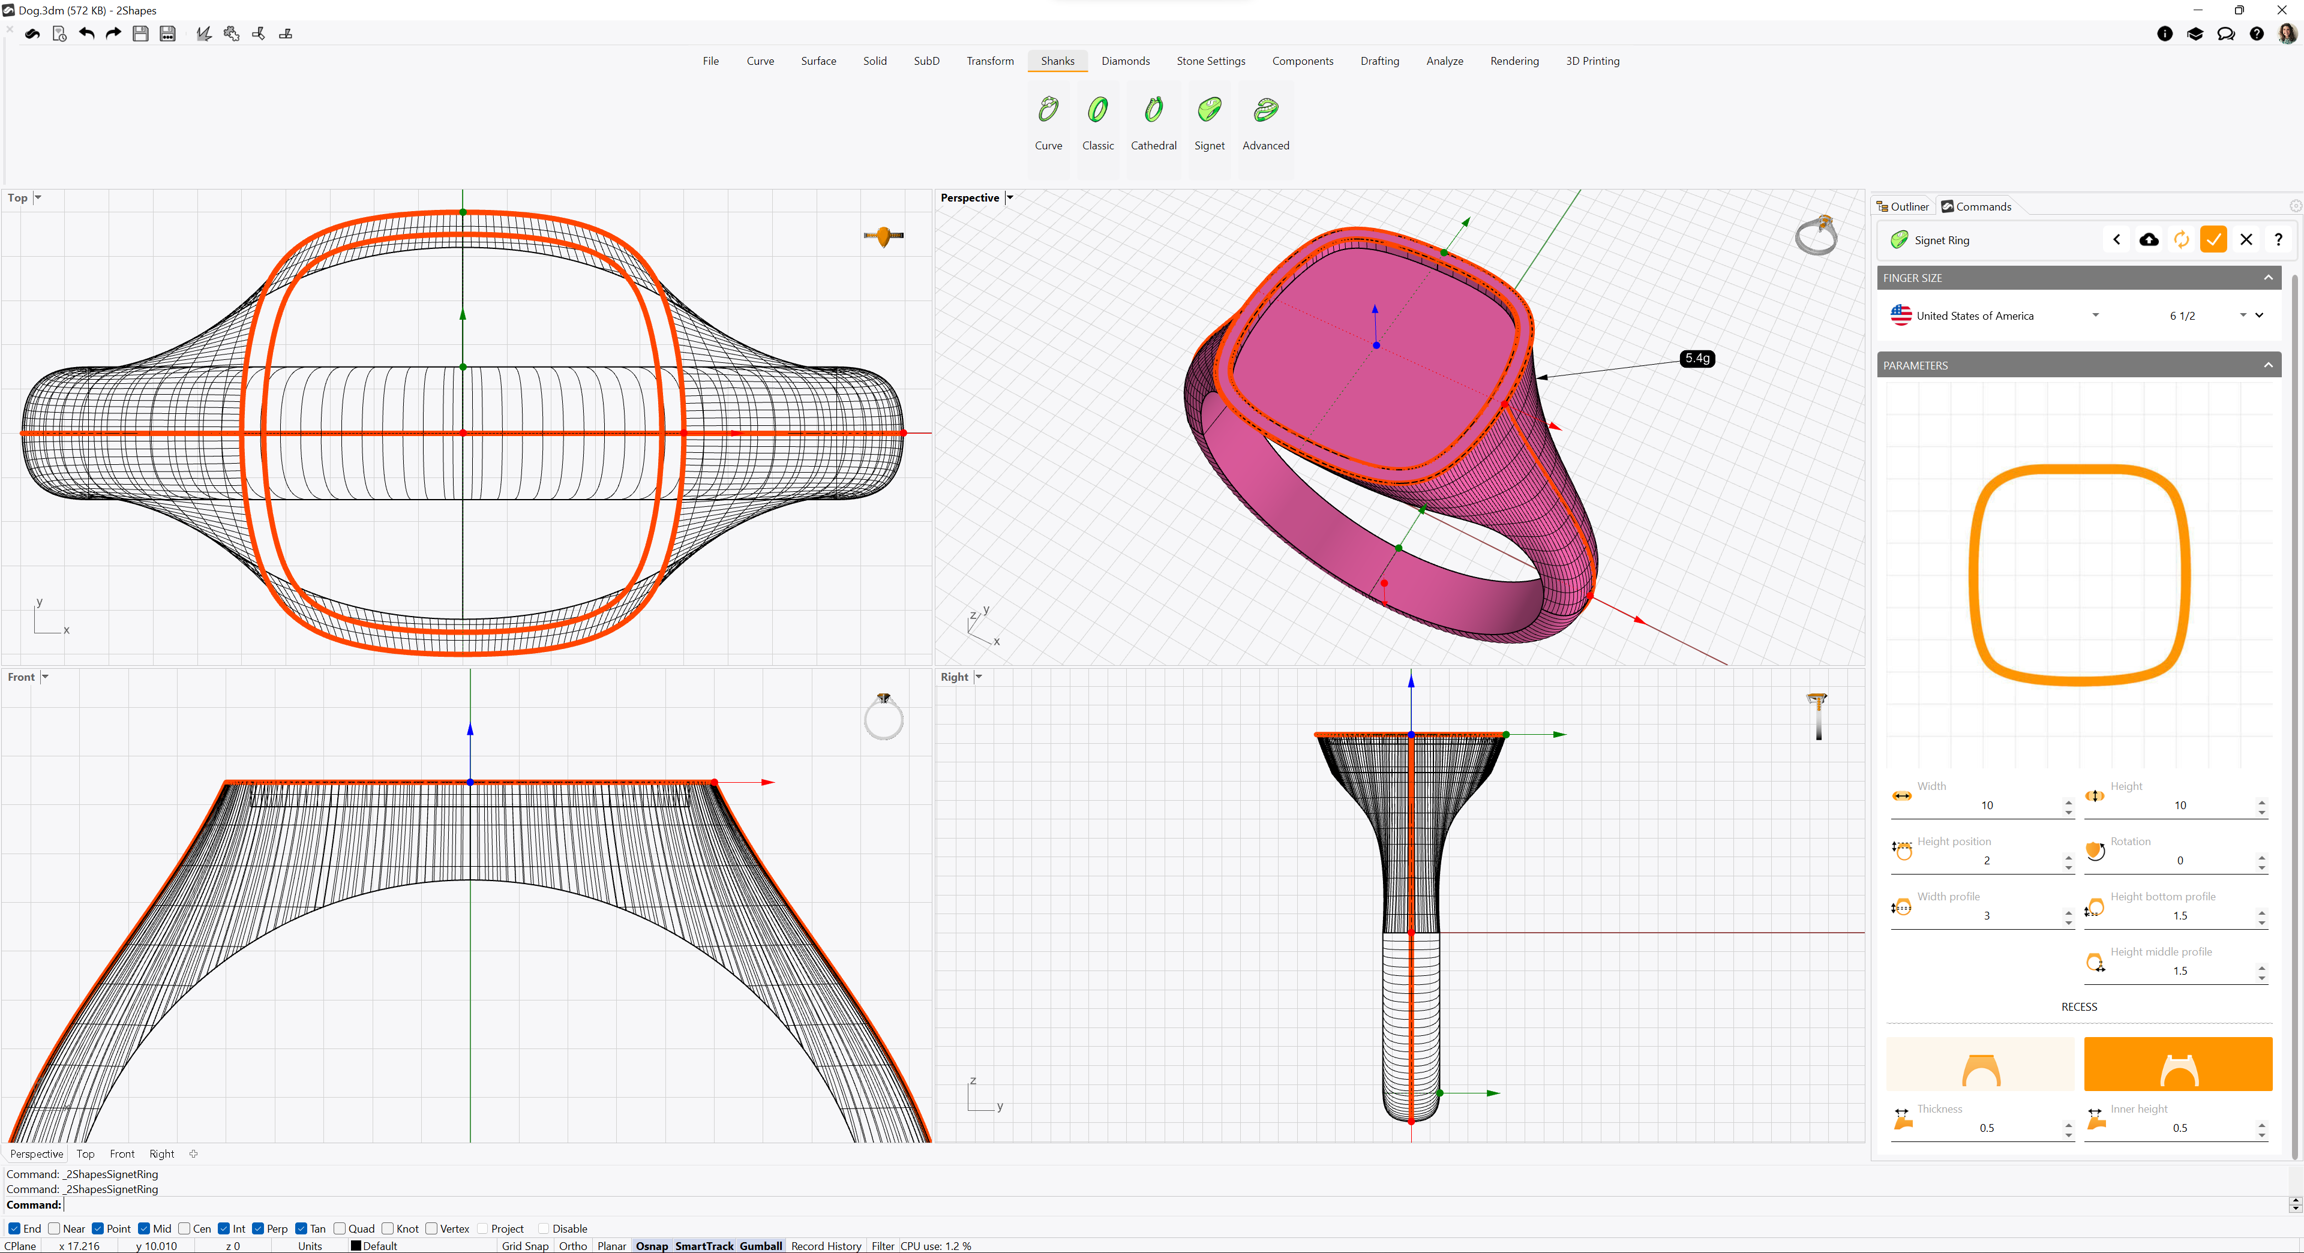
Running this command will display its parameters in the Commands toolbar. Your first step should be to choose whether you want to start working on a Standard style provided by 2Shapes, or an Organization style you have previously created.
On its parameters, you can find the ring size, measurements and the asset that will give shape to the signet area, and options to make a recess on the ring.
When you confirm your changes, the Signet Ring will be listed on the Outliner toolbar.
Learn more about this command in Academy
 Advanced Ring
Advanced RingUsing this command, you can create advanced rings, a shank that can have multiple sections with multiple measurements and assets, to create your own custom shank type.
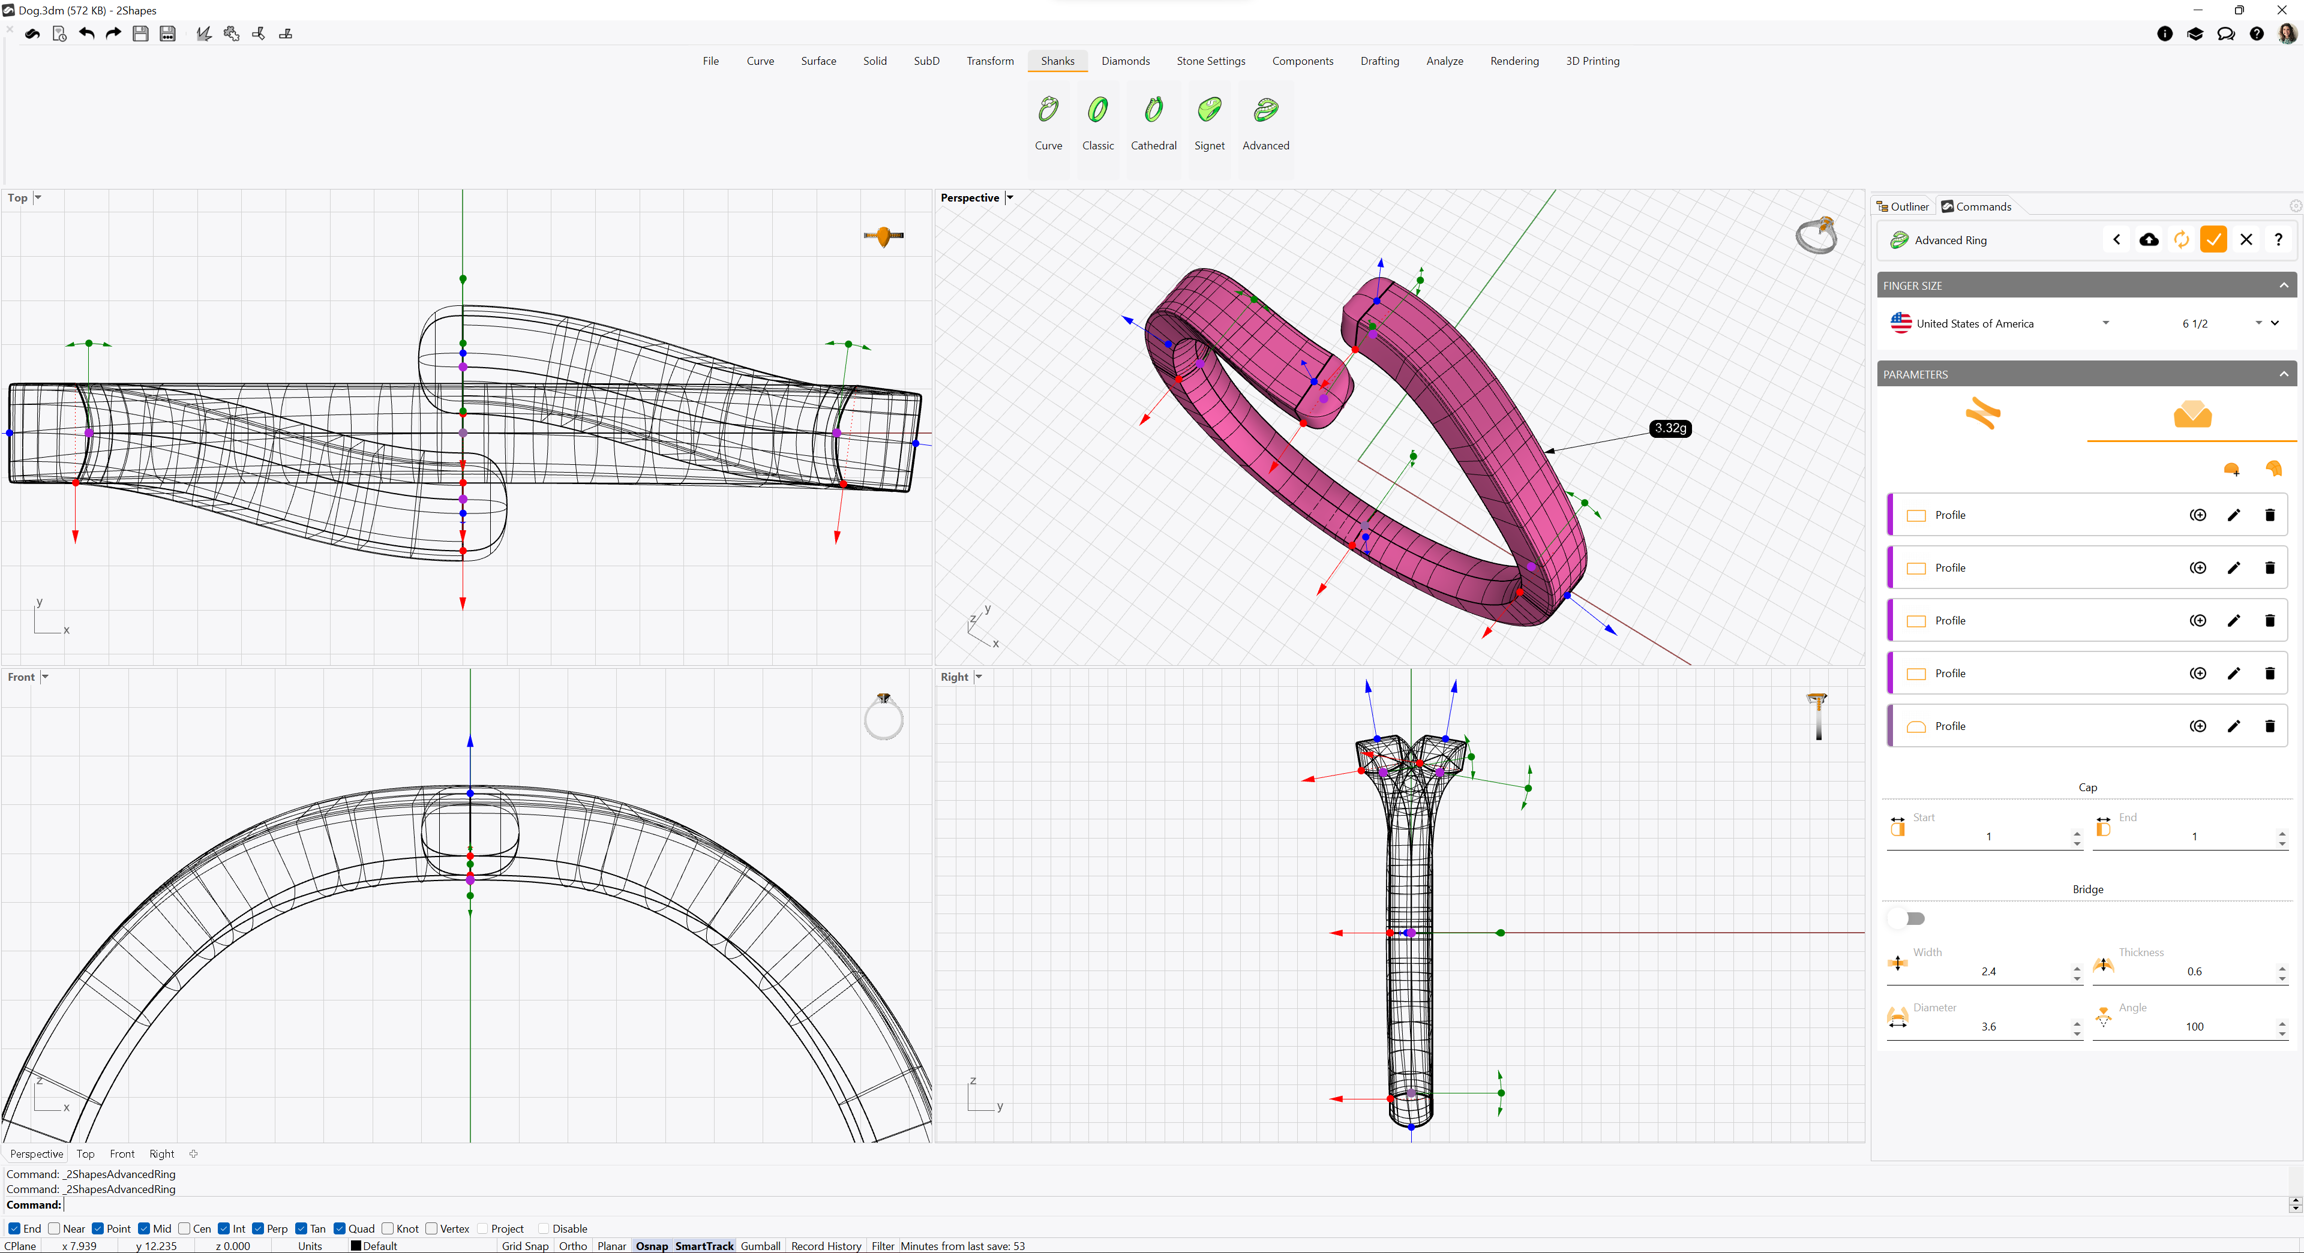
Running this command will display its parameters in the Commands toolbar. Your first step should be to choose whether you want to start working on a Standard style provided by 2Shapes, or an Organization style you have previously created.
On its parameters, you can find the ring size, its main measurements, the shank configuration, and on the second tab, options to add, remove, or edit its sections and the asset that will give shape to each of them.
When you confirm your changes, the Advanced Ring will be listed on the Outliner toolbar.
Learn more about this command in Academy